Proper Usage
How do I take REVESTIVE?
Always use this medicine exactly as your doctor has told you. Check with your doctor, pharmacist or nurse if you are not sure.
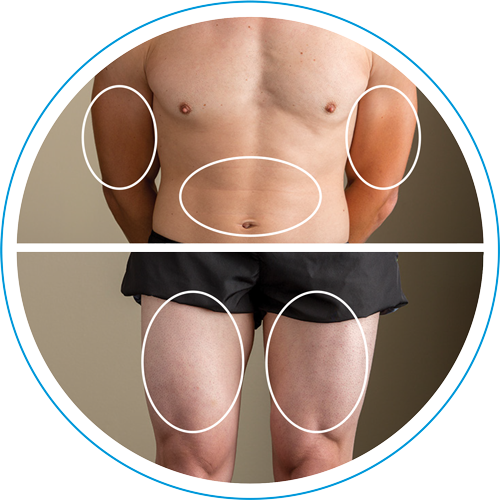
REVESTIVE is injected under the skin (subcutaneously) once daily. The injection can be self-administered or given by another person, for example your doctor, his/her assistant or your home nurse. If you are injecting the medicine yourself, you must receive adequate training by your doctor or nurse. Do not use the same area each day for each injection. Rotate the site of injection between the upper, lower, left and right side of your belly, either arm or either thigh.
If you would like an injection placemat, contact your OnePath Patient Support Program Care Manager.
You will find detailed instructions for the preparation, reconstitution and administration of REVESTIVE here.

Step-by-step video guide for the administration of REVESTIVE
Step-by-step instructions for injection
Please click on a button to load the corresponding step.
Before you start
Important Information:
- Read the Patient Medication Information leaflet that came with your medication before using REVESTIVE.
- REVESTIVE is for injection under the skin (subcutaneous injection).
- Do not inject REVESTIVE into a vein (intravenously) or muscle (intramuscularly).
- Keep REVESTIVE out of the sight and reach of children.
- Do not use REVESTIVE after the expiry date, which is stated on the carton, the vial and the pre-filled syringe. The expiry date refers to the last day of that month.
- Store below 25°C. Do not freeze.
- The product should be used within 3 hours after reconstitution.
- Do not use REVESTIVE if you notice that the solution is cloudy or contains particulate matter.
- Do not throw away any medicines via wastewater or household waste. Ask your pharmacist how to throw away medicines you no longer use. These measures will help protect the environment.
- Dispose of all needles and syringes in a sharps disposal container.
Before you start
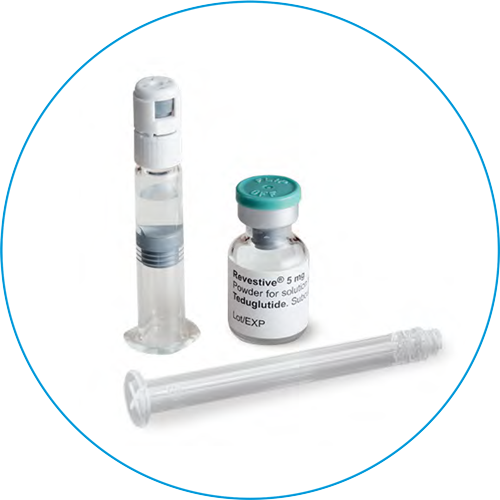
Materials in the REVESTIVE pack:
- 28 vials with 5 mg teduglutide as a powder
- 28 pre-filled syringes with diluent
Materials needed but not included in the pack:
Adults
-
Reconstitution needles
(size 22G, length 1½” [0.7 x 40 mm]) -
1 mL injection syringes
(with scale intervals of 0.02 mL or smaller) -
Thin injection needles for subcutaneous injection
(e.g., size 26G, length 5/8” [0.45 x 16 mm]) - Alcohol swabs
- A puncture-proof container for safe disposal of the used syringes and needles
Pediatrics
-
Reconstitution needles
(size 22G, length 1½” [0.7 x 40 mm]) -
1 mL injection syringes
(with scale intervals of 0.02 mL or smaller) -
Thin injection needles for subcutaneous injection
(e.g. size 30G, length 1/2" [0.31 x 12.7 mm]) - Alcohol swabs
- A puncture-proof container for safe disposal of the used syringes and needles
NOTE: Before you start, make sure you have a clean work surface and that you have washed your hands before proceeding.
1. Assemble the pre-filled syringe
Once you have all the materials ready, you need to assemble the pre-filled syringe. The following procedure shows how you do this.
1.1
Take the pre-filled syringe with diluent and flip off the top part of the white plastic cap so that it is ready for the reconstitution needle to be attached.
1.2
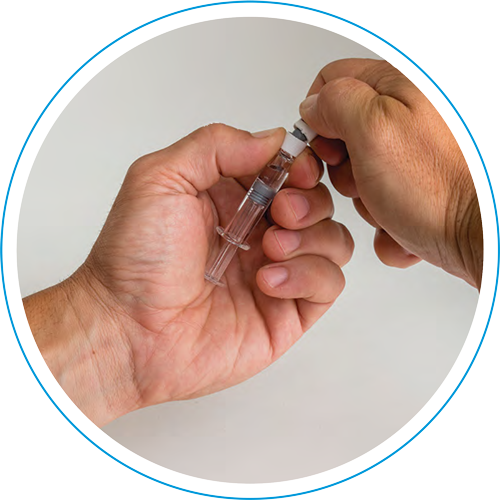
Attach the reconstitution needle (22G, 1½" [0.7 x 40 mm]) to the assembled pre-filled syringe by screwing it on in a clockwise direction.
2. Dissolve the powder
Now you are ready to dissolve the powder with the diluent.

2. Dissolve the powder
2.1
Remove the green flip-off button from the powder vial, wipe the top with an alcohol wipe and allow to dry. Do not touch the top of the vial.
2. Dissolve the powder
2.2
Uncap the reconstitution needle on the assembled pre-filled syringe with diluent without touching the tip of the needle.

2. Dissolve the powder
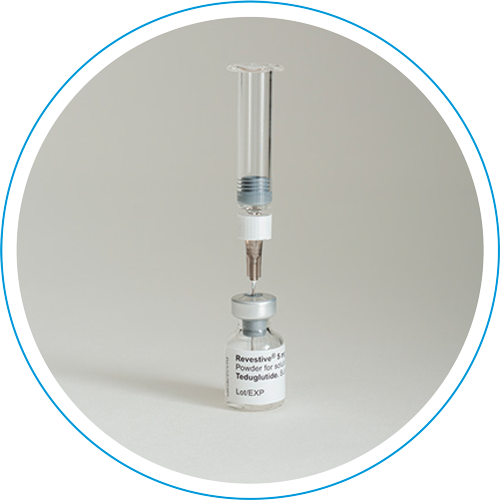
2.3
Taking the powder vial, insert the reconstitution needle attached to the assembled pre-filled syringe into the centre of the rubber stopper and gently push the plunger all the way down to inject all the diluent into the vial.
2. Dissolve the powder
2.4
Leave the reconstitution needle and empty syringe in the vial. Let the vial rest for approximately 30 seconds.

2. Dissolve the powder
2.5
Gently roll the vial between your palms for about 15 seconds. Then gently turn the vial upside-down once with the reconstitution needle and empty syringe still in the vial.
NOTE: Do not shake the vial. Shaking the vial may produce foam, which makes it difficult to extract the solution from the vial.
2. Dissolve the powder
2.6
Let the vial rest for about two minutes.
2. Dissolve the powder
2.7
Observe the vial for any undissolved powder. If any powder remains, repeat steps 2.5 and 2.6. Do not shake the vial. If there is still some undissolved powder, discard the vial and start the preparation again from the beginning with a new vial.
NOTE: The final solution should be clear. If the solution is cloudy or contains particulate matter, do not inject it.
NOTE: The product should be used within 3 hours after reconstitution.

3. Prepare the injection syringe
3.1
Remove the reconstitution syringe from the reconstitution needle which is still in the vial and discard the reconstitution syringe.
3. Prepare the injection syringe
3.2
Take the injection syringe and attach it to the reconstitution needle which is still in the vial.
3. Prepare the injection syringe
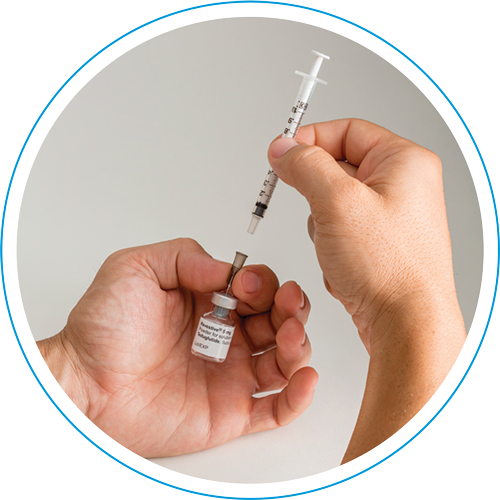
3.3
Turn the vial upside down, slide the tip of the reconstitution needle close to the stopper and allow ALL the medicine to fill the syringe by pulling the plunger back gently.
NOTE: If your doctor has told you that you need two vials, prepare a second pre-filled syringe with diluent and a second powder vial as shown in the main steps 1 and 2. Withdraw the solution from the second vial into the same injection syringe by repeating step 3.

3. Prepare the injection syringe
3.4
Remove the injection syringe from reconstitution needle leaving the needle in the vial. Discard the vial and reconstitution needle together into the sharps disposal container.
3. Prepare the injection syringe
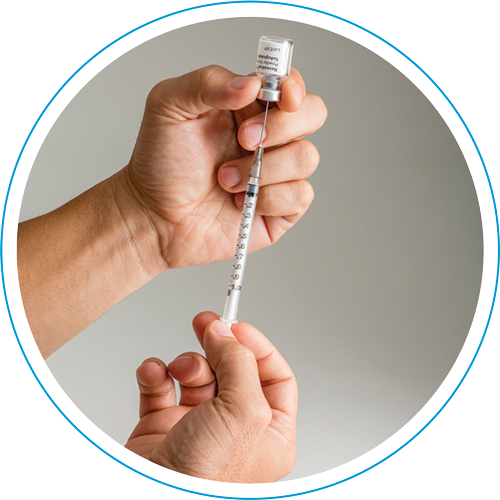
3.5
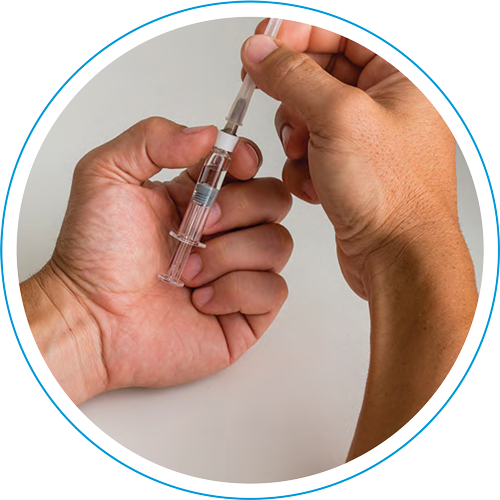
Take the injection needle (Adults: 26G, 5/8" [0.45 x 16 mm]) or (Pediatrics: 30G, 1/2” [0.31 x 12.7 mm]), but do not remove the plastic needle cap. Attach the needle to the injection syringe containing the medicine.

3. Prepare the injection syringe
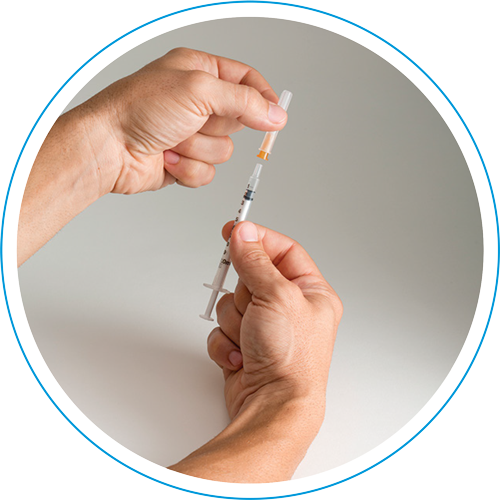
3.6
Check for air bubbles. If air bubbles are present, gently tap the syringe until they rise to the top. Then gently push up the plunger to expel the air.

3. Prepare the injection syringe
3.7
Your dose in mL has been calculated by your doctor. Expel any excessive volume from the syringe with the needle cap still on until your dose is reached.
4. Inject the solution
4.1
Find an area on your belly, upper arm, or on your thigh where it is easy for you to give the injection (see the diagram).
NOTE: Do not use the same area each day for each injection - rotate sites (use upper, lower, and left and right side of your belly, or either upper arm or thigh) to avoid discomfort. Avoid areas that are inflamed, swollen, scarred or covered by a mole, birthmark or other lesion.

4. Inject the solution
4.2
Clean the intended site of injection on your skin with an alcohol swab, using a circular motion, working outwards. Allow the area to air-dry.

4. Inject the solution
4.3
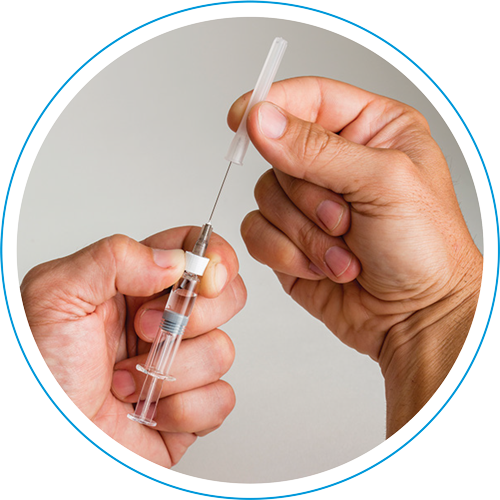
Remove the plastic cap from the needle of the prepared injection syringe. Gently grasp the cleaned skin at the injection site with one hand. With the other hand, hold the syringe as you would with a pencil. Bend your wrist back and quickly insert the needle at a 45° angle.
4. Inject the solution
4.4
Pull back the plunger slightly. If you see any blood in the syringe, withdraw the needle and replace the needle on the injection syringe with a clean one of the same size. You can still use the medicine that is already in the syringe. Try to inject in another place in the cleaned skin area.
4.5
Inject the medicine slowly by pushing steadily on the plunger until all the medicine is injected and the syringe is empty.
4.6
Pull the needle straight out of the skin and discard the needle and syringe together into the sharps disposal container. A small amount of bleeding may occur. If necessary, press gently on the injection site with an alcohol swab or 2x2 gauze until any bleeding has stopped.

5. Disposal
Dispose all needles and syringes in a sharps disposal container or hard-walled container (for example, a detergent bottle with a lid). This container must be puncture proof (top and sides).
If you need a sharps disposal container, please contact your doctor.